Python Programming Quick Guide - CTF Related
https://yulizi123.github.io/tutorials/python-basic/basic/
https://docs.python.org/3/
https://docs.pwntools.com/en/stable/
Module installation
There are many ways to install external modules, and the form of installation varies from system to system. Installing Python packages on Windows, for example, might even kill you. Haha.
What is an external module?
An external module is what you use when you import something into a python script.
import numpy as np
import matplotlib.pyplot as plt
Numpy and matplotlib are both external modules that need to be installed. They are not part of python's own modules.
Installing Numpy
For example, there are many ways to install modules for scientific operations, such as numpy. On Windows, the easiest way is to install Anaconda, which has many necessary external modules. Install one, and save yourself the trouble of installing others.
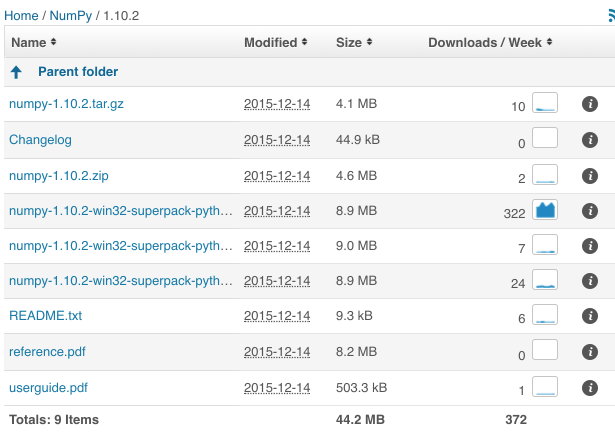
However, I want to talk about downloading the installation package and installing it on Windows. For example, on the Numpy installer website, you can find various versions of numpy.
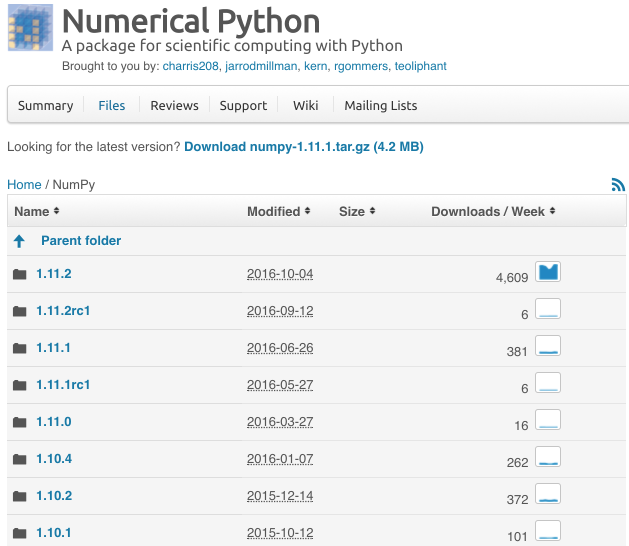
In NumPy 1.10.2, we can find installers for Windows, but no Windows installers have been added to the new version yet. Then choose the appropriate "exe" installer for your system and python version. Download and install.
If you are on MacOS or Linux, this external module is much easier to install. You can easily install it by typing a phrase into your computer's Terminal. Windows seems to have to be set up in a special way to do the same thing, I don't know... you might want to look it up. On my computer, the Terminal looks like this.
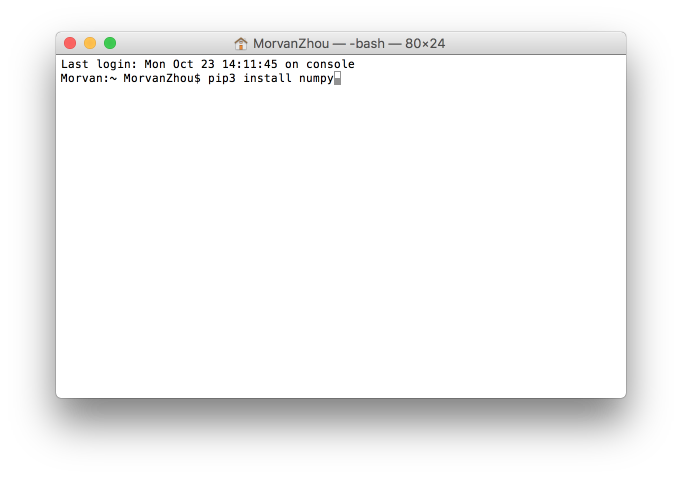
Then you can install it if you type in this form.
$ pip install the name of the module you want
For example
$ pip install numpy # This is for the python2+ version
$ pip3 install numpy # This is for the python3+ version
Updating external modules
Updating external modules with pip is very simple. All you need to do is type the following command into Terminal. The -U here means update.
$ pip install -U numpy # This is for the python2+ version
$ pip3 install -U numpy # This is for the python3+ version
pwntools
pwntools is a CTF framework and exploit development library. Written in Python, it is designed for rapid prototyping and development, and intended to make exploit writing as simple as possible.
The primary location for this documentation is docs.pwntools.com, which uses readthedocs. It comes in three primary flavors:
Installation
Pwntools is best supported on 64-bit Ubuntu LTS releases (14.04, 16.04, 18.04, and 20.04). Most functionality should work on any Posix-like distribution (Debian, Arch, FreeBSD, OSX, etc.).
Prerequisites
To get the most out of pwntools, you should install the following system libraries.
- Binutils
- Ubuntu
- Mac OS X
- Alternate OSes
- Python Development Headers
- Ubuntu
- Mac OS X
Released Version
pwntools is available as a pip package for both Python2 and Python3.
Python3
$ apt-get update
$ apt-get install python3 python3-pip python3-dev git libssl-dev libffi-dev build-essential
$ python3 -m pip install --upgrade pip
$ python3 -m pip install --upgrade pwntools
Python2 (Deprecated)
NOTE: Pwntools maintainers STRONGLY recommend using Python3 for all future Pwntools-based scripts and projects.
Additionally, due to pip dropping support for Python2, a specific version of pip must be installed.
$ apt-get update
$ apt-get install python python-pip python-dev git libssl-dev libffi-dev build-essential
$ python2 -m pip install --upgrade pip==20.3.4
$ python2 -m pip install --upgrade pwntools
Command-Line Tools
When installed with sudo the above commands will install Pwntools’ command-line tools to somewhere like /usr/bin.
However, if you run as an unprivileged user, you may see a warning message that looks like this:
Follow the instructions listed and add ~/.local/bin to your $PATH environment variable.
Development
If you are hacking on Pwntools locally, you’ll want to do something like this:
$ git clone https://github.com/Gallopsled/pwntools
$ pip install --upgrade --editable ./pwntools
Getting Started
To get your feet wet with pwntools, let’s first go through a few examples.
When writing exploits, pwntools generally follows the “kitchen sink” approach.
>>> from pwn import *
This imports a lot of functionality into the global namespace. You can now assemble, disassemble, pack, unpack, and many other things with a single function.
A full list of everything that is imported is available from pwn import *.
Tutorials
A series of tutorials for Pwntools exists online, at https://github.com/Gallopsled/pwntools-tutorial#readme
Making Connections
You need to talk to the challenge binary in order to pwn it, right? pwntools makes this stupid simple with its pwnlib.tubes module.
This exposes a standard interface to talk to processes, sockets, serial ports, and all manner of things, along with some nifty helpers for common tasks. For example, remote connections via pwnlib.tubes.remote.
>>> conn = remote('ftp.ubuntu.com',21)
>>> conn.recvline() # doctest: +ELLIPSIS
b'220 ...'
>>> conn.send(b'USER anonymous\r\n')
>>> conn.recvuntil(b' ', drop=True)
b'331'
>>> conn.recvline()
b'Please specify the password.\r\n'
>>> conn.close()
It’s also easy to spin up a listener
>>> l = listen()
>>> r = remote('localhost', l.lport)
>>> c = l.wait_for_connection()
>>> r.send(b'hello')
>>> c.recv()
b'hello'
Interacting with processes is easy thanks to the pwnlib.tubes.process.
>>> sh = process('/bin/sh')
>>> sh.sendline(b'sleep 3; echo hello world;')
>>> sh.recvline(timeout=1)
b''
>>> sh.recvline(timeout=5)
b'hello world\n'
>>> sh.close()
Not only can you interact with processes programmatically, but you can actually interact with processes.
>>> sh.interactive() # doctest: +SKIP
$ whoami
user
There’s even an SSH module for when you’ve got to SSH into a box to perform a local/setuid exploit with pwnlib.tubes.ssh. You can quickly spawn processes and grab the output, or spawn a process and interact with it like a process tube.
>>> shell = ssh('bandit0', 'bandit.labs.overthewire.org', password='bandit0', port=2220)
>>> shell['whoami']
b'bandit0'
>>> shell.download_file('/etc/motd')
>>> sh = shell.run('sh')
>>> sh.sendline(b'sleep 3; echo hello world;')
>>> sh.recvline(timeout=1)
b''
>>> sh.recvline(timeout=5)
b'hello world\n'
>>> shell.close()
Packing Integers
A common task for exploit-writing is converting between integers as Python sees them, and their representation as a sequence of bytes. Usually, folks resort to the built-in struct module.
pwntools makes this easier with pwnlib.util.packing. No more remembering unpacking codes, and littering your code with helper routines.
>>> import struct
>>> p32(0xdeadbeef) == struct.pack('I', 0xdeadbeef)
True
>>> leet = unhex('37130000')
>>> u32(b'abcd') == struct.unpack('I', b'abcd')[0]
True
The packing/unpacking operations are defined for many common bit-widths.
>>> u8(b'A') == 0x41
True
Setting the Target Architecture and OS
The target architecture can generally be specified as an argument to the routine that requires it.
>>> asm('nop')
b'\x90'
>>> asm('nop', arch='arm')
b'\x00\xf0 \xe3'
However, it can also be set once in the global context. The operating system, word size, and endianness can also be set here.
>>> context.arch      = 'i386'
>>> context.os        = 'linux'
>>> context.endian    = 'little'
>>> context.word_size = 32
Additionally, you can use a shorthand to set all of the values at once.
>>> asm('nop')
b'\x90'
>>> context(arch='arm', os='linux', endian='big', word_size=32)
>>> asm('nop')
b'\xe3 \xf0\x00'
Setting Logging Verbosity
You can control the verbosity of the standard pwntools logging via context.
For example, setting
>>> context.log_level = 'debug'
This will cause all of the data sent and received by a tube to be printed on the screen.
Assembly and Disassembly
Never again will you need to run some already-assembled pile of shellcode from the internet! The pwnlib.asm module is full of awesome.
>>> enhex(asm('mov eax, 0'))
'b800000000'
But if you do, it’s easy to suss out!
>>> print(disasm(unhex('6a0258cd80ebf9')))
   0:   6a 02                   push   0x2
   2:   58                      pop    eax
   3:   cd 80                   int    0x80
   5:   eb f9                   jmp    0x0
However, you shouldn’t even need to write your own shellcode most of the time! pwntools comes with the pwnlib.shellcraft module, which is loaded with useful time-saving shellcodes.
Let’s say that we want to setreuid(getuid(), getuid()) followed by duping file descriptor 4 to stdin, stdout, and stderr, and then pop a shell!
>>> enhex(asm(shellcraft.setreuid() + shellcraft.dupsh(4))) # doctest: +ELLIPSIS
'6a3158cd80...'
Misc Tools
Never write another hexdump, thanks to pwnlib.util.fiddling.
Find offsets in your buffer that cause a crash, thanks to pwnlib.cyclic.
>>> cyclic(20)
b'aaaabaaacaaadaaaeaaa'
>>> # Assume EIP = 0x62616166 (b'faab' which is pack(0x62616166))  at crash time
>>> cyclic_find(b'faab')
120
ELF Manipulation
Stop hard-coding things! Look them up at runtime with pwnlib.elf.
>>> e = ELF('/bin/cat')
>>> print(hex(e.address)) #doctest: +SKIP
0x400000
>>> print(hex(e.symbols['write'])) #doctest: +SKIP
0x401680
>>> print(hex(e.got['write'])) #doctest: +SKIP
0x60b070
>>> print(hex(e.plt['write'])) #doctest: +SKIP
0x401680
You can even patch and save the files.
>>> e = ELF('/bin/cat')
>>> e.read(e.address, 4)
b'\x7fELF'
>>> e.asm(e.address, 'ret')
>>> e.save('/tmp/quiet-cat')
>>> disasm(open('/tmp/quiet-cat','rb').read(1))
'   0:   c3                      ret'